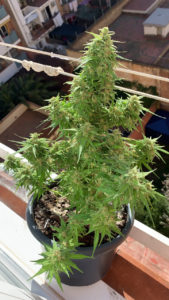
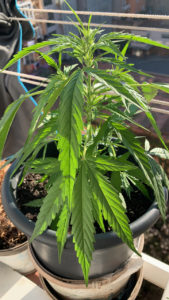
If you don’t have space indoors, or simply want to avoid the investment in costly indoor grow equipment and accessories, growing marijuana outside is an ideal alternative. With soil, water, sun — and a heavy dose of TLC (tender loving care, not to be confused with THC) – you can grow a nice little crop of your own!
The following is a basic guide with ten steps for successfully growing marijuana outdoors in the comfort and privacy of your own home.
Step 1: Do you have the right climate?
Before considering growing an outdoor crop of marijuana, you should first make sure you have the right climate. Fortunately, Barcelona’s sunny weather is perfect for growing outdoors. Moreover, Barcelona also has a great legal climate for growing weed.
Step 2: Choose a space for your garden.
Just like creating the right conditions indoors for an indoor grow, choosing an outdoor space with the proper environment is critical to the success of your garden.
A few tips:
- Pick a spot where your plants will get as much direct sunlight as possible, especially during midday when the quality of light is the best. While a constant breeze is good for your plants, especially in warmer climates, you don’t want your plants to be exposed to a lot of high winds. For this reason, consider planting near a windbreak, such as a wall, fence or large shrubs. If the weather becomes too windy, consider bringing your plant(s) indoors for the time being.

- Privacy and security are also important factors to consider. Unless you live in a secluded area, try to select an area that’s surrounded by a tall fence, large shrubs and/or trees. Also, keep in mind that you’ll need to think about how big you want your grown plants to be. Outdoor cannabis can grow up to 15 feet (4.57 m) tall or more, depending on how much you let them go.
- Keep critters at bay. If you live in an area where small animals tend to roam and feed on foliage, consider placing heavy-gauge wire around your plants to keep them out.
Step 3: Determine the strain you want to grow.
The strain of cannabis you grow will be largely dependent on your climate and location. Fortunately, the warm and sunny weather in Barcelona provides a great climate for growing both indica and sativa strains with excellent results.
Step 4: Select your soil.
With marijuana, similar to many other plants, you can plant your seeds directly in the ground or buy soil and grow it in pots. Keep in mind that cannabis plants thrive in soil that’s rich in organic matter, plus they require good drainage.
In terms of the best kind of soil for marijuana, heavy clay soils are not recommended, because they drain slowly and do not hold oxygen well. Sandy soil is easy to work, drains well, and warms quickly. However, it doesn’t hold nutrients well. Silty soil is the ideal growing medium. It’s easy to work, warms quickly, holds moisture, has good drainage, and it contains a lot of nutrients. The best silty soil is a dark crumbly loam, which is very fertile.
If you want to ensure the best results with your soil, consider having it tested, which is easy and relatively inexpensive. A soil testing service will tell you the makeup and pH of your soil, reveal any contaminants, and recommend the best fertilizers for the soil.
Step 5: Prepare for the plant.
At least one month before you plant, dig holes where you’ll be placing your cannabis plants and mix in compost, manure, worm castings, or other decomposed organic matter. This will provide aeration and drainage, in addition to vital nutrients for the plants.

Step 6: Get your fertilizer.
As mentioned in the previous step, nutrients are essential for the successful growth of marijuana plants. For first time growers, it’s best to start off with fertilizers that are inexpensive and readily available. Organic fertilizers are ideal, because they take full advantage of microbial life in soil and minimize harmful runoff. There are many different types of natural, organic fertilizers available at home and garden stores, including blood meal, bone meal, fish meal, bat guano, and kelp meal.
Step 7: Choose your containers.
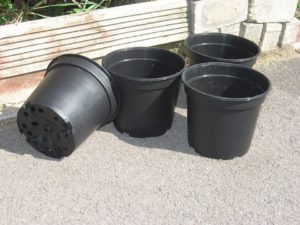
If you decide on containers versus planting directly into the ground (perhaps due to the poor quality of your soil), there are a variety of containers you can choose from. In general, 5-gallon pots are the best size for small to medium outdoor plants, and ten-gallon pots are recommended for larger plants. Whichever size you choose, you need to keep in mind that pots quickly get hot in the direct sunlight, which will severely limit the growth of your plants. So, be sure to shade your containers when the sun is high in the sky.

Step 8: Plant and water.

After planting, you’ll need to water your plants frequently, especially in the hottest months. Keep in mind that outdoor cannabis gardens do have the benefit of rain and groundwater, but you’ll still need to keep a close watch and ensure that they have an adequate supply of water throughout the entire day.
The best rule-of-thumb is to water deeply, then wait until the top inch or two of soil is completely dry before watering again. It’s also important to remember that when it’s a particularly rainy season, you may need to improve drainage around your garden, as cannabis roots are susceptible to fungal diseases when they become waterlogged.
Step 9: Protection against pests.
We already mentioned using wire around your plants to keep small animals away. But what about insects, which can do some serious damage to your outdoor plants when left unattended?
Here are a few tips for keeping pests from your pot:
- Especially during the first two months of growth, the pests you’ll want to pay the closest attention to are slugs, snails, caterpillars, leaf-eating insects, and beetles. Consider natural pesticides and repellents, keeping in mind that you’ll eventually be smoking the flowers of your plants – so pay special attention to the chemicals in the products you use. Again, always think natural and organic!
- Use “positive pest predators” to deter the real pests that threaten your plants. Ladybugs, praying mantises, and lacewings are all examples of predators you can use to your advantage when dealing with outdoor plant pests. Because these friendly insects are so widely used in the gardening world, you can purchase them commercially.
Step 10: Cultivate, nurture, grow and enjoy!
If you follow the steps outlined above, you’re on your way to growing your own marijuana plants and enjoying them in the privacy of your own home!
Stay tuned to our blog for more tips, information and education on all things cannabis related!


Cheers, great stuff, Me like.